I did it... I finished it...
And, I feel like I've been hit by a bus, but it's DONE~ Yay...
And, it matches the little bench.

I done a couple different steps on this one than I did to the bench, so take a look see ...
To see the technique and read the process, click "Read More" right below...
~Brace yourself for "Picture Overload"~!
There are ALOT of pictures of this process, so if you're a visual creature like me. You should be able to paint yourself a work of art firt thing in the morning from this tutorial...
(You're welcome~!)
I started with this old. crazy faux painted gun cabinet that the man-child reworked inside to add me some towel shelves.Yes, it was this brightly colored in the sun. It's a mustard orange and maroon color faux job.
Someone also took the time to take a paint bruch with white paint and flick it all over it ~ oy' vey!
Hey, for $25 ~ I was up for the challenge.
And, it was the exact dimensions I need for the bathroom towel cabinet.

The man-child added some wood crown and rope moldings for me, to spiff it up a bit...
I sanded off as much of that 'faux' mess as I could...


I started with some burnt umber acrylic paint and some crackle medium. I wanted to put a dark base coat in certain areas and then crackle a cream color over them, just for the distressing...

By the way, NOT impressed with the American crackle medium, but it was all I could find in town!
I WOULD NEVER buy this brand again. It doesn't even compare to Folkart brand crackle...
I base painted strategic spots brown, let them dry and then put the crackle medium over the brown and let it dry. Looks like a cow, but, I had a plan... It gets better, keep reading - lol
Wow, and I was complaining about the 'prior' faux job ~ lol
Trust me, I think I know what I'm doing...

Then, I covered the whole cabinet in an 'antique ivory' color of bear satin paint...
See, it crackles where I had the brown 'cow spots' and it gives a dark underlayer to show the cracks...
~That was the point of the polka dot, cow, first step~

You don't have to be pretty when you paint this way - just slap it on.
I'm like a speed demon when I do this...

I wanted the carved wood to have cracks, but also around them, for a distressed look I like...

Let the base color dry and then start layering the various shades of blue paint, starting from darkest to light...


Let it dry and use a palm sander to distress it...
Distressing it with the sander took me 2 hours~ my hand still hurts~!


Then, it started to rain, so I had to hurry it into the kitchen~!


Then, I had to do the interior - it started as mustard yellow.

I only sanded it lightly to rough it up and then just slapped the ivory all over the interior...


I just slapped ivory on the interior of the door too - don't even try to be perfect, just slap it on there.
You don't have to cover all the wood either.
Make your brush strokes all different too ~ some up and down, some sideways.
It adds to the distressing, when you anitque it.

I used the same stain as on the bench - Minwax Jacobean
I work the stain in sections. I put it on, wipe it off and buff and move to another section...
It's kind of scary the first time you do it, but I promise, it leaves an awesome antique/old look.
In this pic, the top of the door has been stained and wiped and buffed. Now, I'm in the middle of the door and the bottom still needs to be stained.
It's a nice way to show the differences to you...

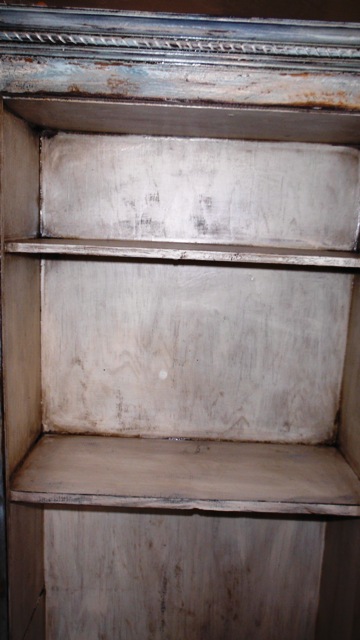
I antiqued the interior of the cupboards also...

Every spot on this cabinet got stained and buffed, even the top and bottom.
I stained the back a solid dark brown too!
I like things FINISHED. Not 1/2 done... I would hate someone to take it off the wall in 50 years and see an unfinished back, ya know~!

Tops & bottoms of shelves ~ don't skimp. Someone will notice...
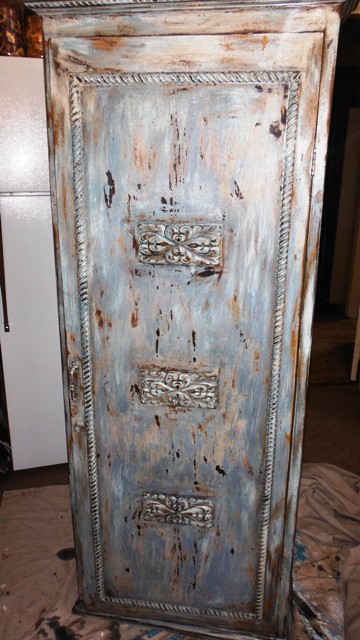
Some up close pics of the detailing, after the stain and buff (antiquing) process...
I LOVE how the crackle, distressing turned out. I just wished it would have been a higher quality crackle medium...


At this point, I wanted to use some antiquing medium, but after a paint mishap in m previous life, I learned that when you antique something with stain, you have to use some polyurethane to seal it, before you add antique medium, or it has a funny chemical reaction and peels the paint...
So, I sealed the whole cabinet with poly and let it dry before the next step...
I forgot to take a pic of the antique medium bottle~!
I threw it away outside already - sorry...
I use Folkart brand antiquing medium and for this piece, I used down home brown (I think that's the name?)
I antiqued over the carved wood embellishments, the rope moldings, the crown molding, around the door, the corners and the crown molding...


Then, I swished back over everything I antiqued with some more poly to seal it...
Done~!!!
Looks so easy in picutres, but I'm not going to lie - it took me about 10 hours...
.jpg)
And, it matches the bathroom bench I redone yesterday ~ !
(Ignore the trail of dogfood. Some dumb blonde got it out of the back of the truck and didn't realize there was a hole until she set it in the shed and turned around to go finish taking pics of her cabinet ~ duh!


Now, maybe someday soon, I can actually start the bathroom redo~!

OmGosh Jen. They are beautiful!!! You are very talented. I just can't get over the transformation of the cabinet.
ReplyDeleteThanks for your instructions. I "may" try it on something small...like a trinket box or something. ha. I don't think I have the talent to redo something like that.
I will say it again. It is just beautiful! Looking forward to seeing the rest of the bathroom remodel!
Lindy
Lindy, I don't think its talent so much as experience. I've been painting for years and years and years...
DeleteI know ALOT of the tricks that make me seem talented ~ lol
It's EASY - give it a try sometime...
Glad you like the cabinet~!
Jen~
=)
Just wanted to let you know that ACE is having their SOUL paint sale this weekend. Awesome deal .. $10.00 OFF a gallon!!! Limit 3 Gallons...I know how you LOVE their paint....Happy painting.
ReplyDelete~Pam~